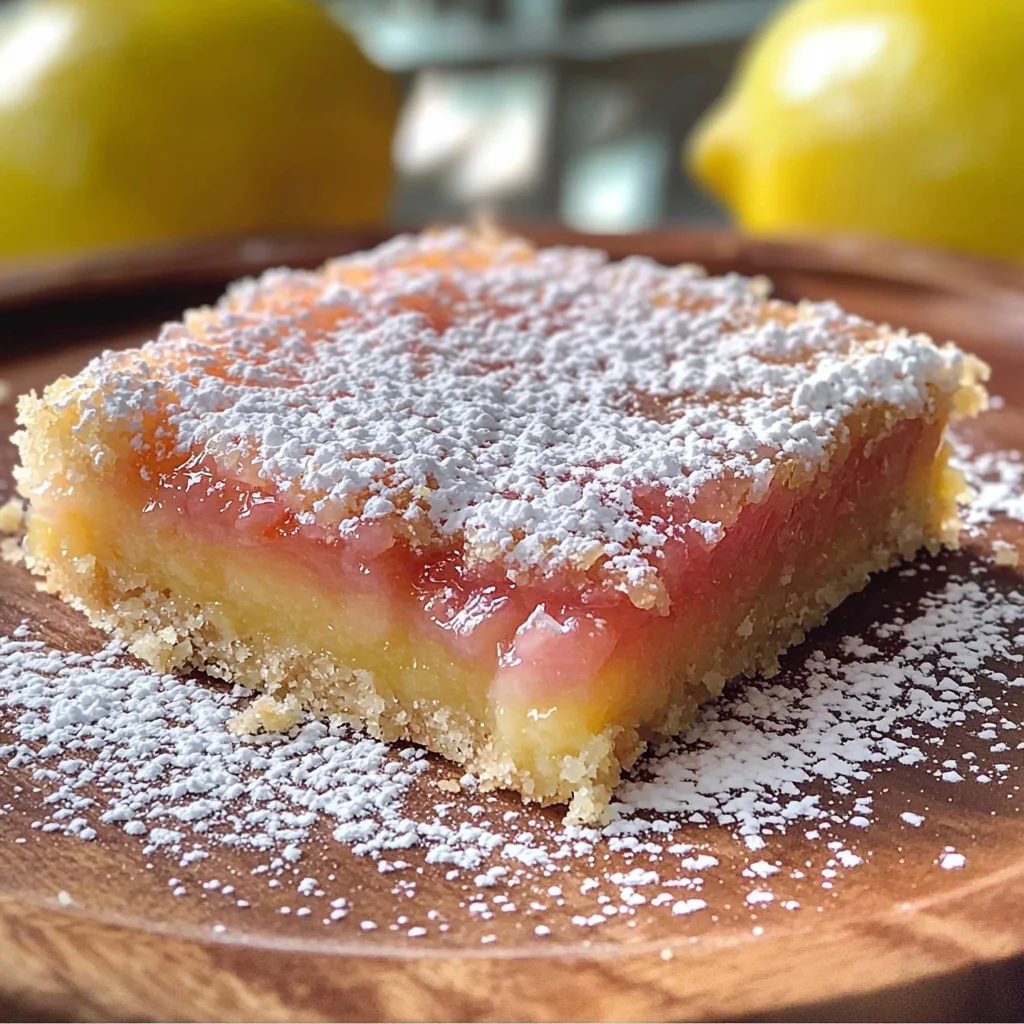
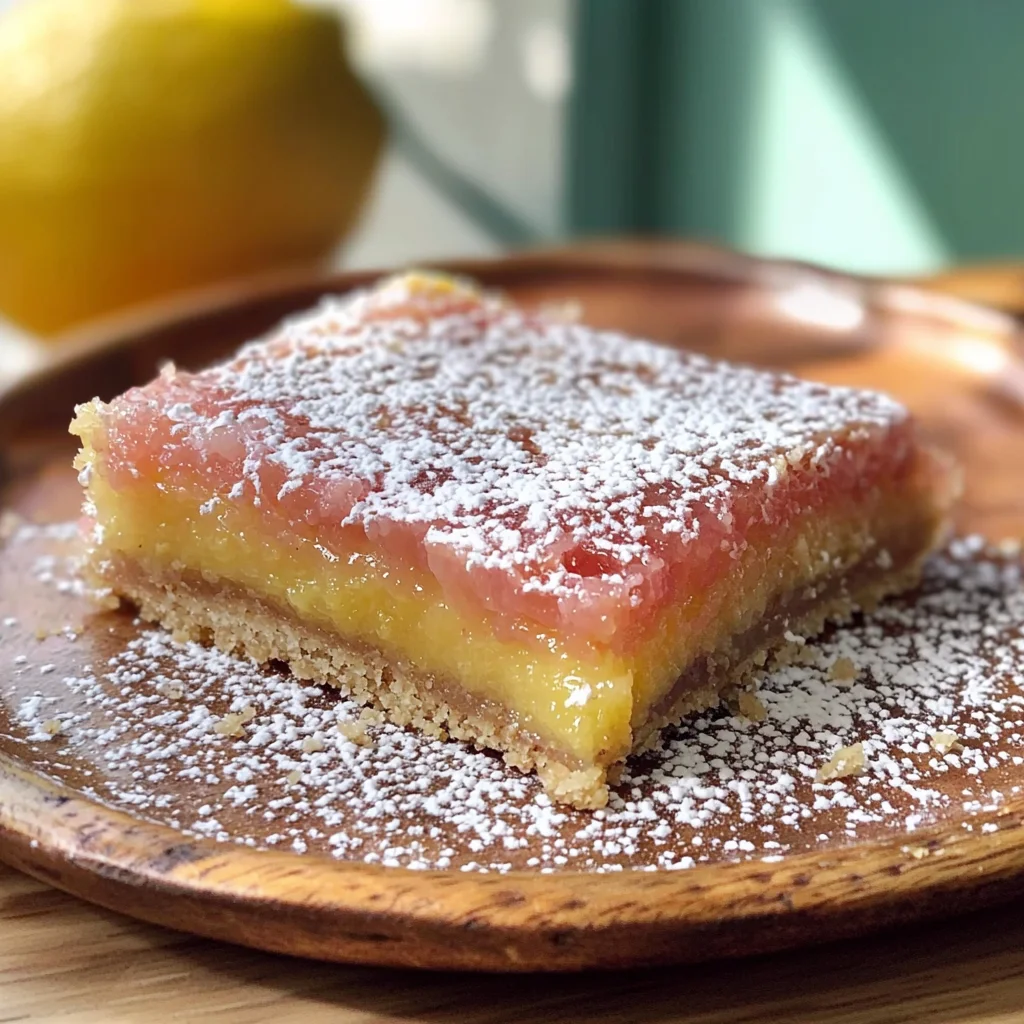
If you’re looking for a delightful twist on a classic dessert, these Hibiscus Lemon Bars are sure to impress! Imagine zesty lemon bars infused with the vibrant flavor of hibiscus—it’s a combination that sings with brightness. Whether you’re baking for a family gathering, a sunny picnic, or just indulging after a long day, this recipe is bound to become a favorite. Plus, they’re perfect for any occasion and will leave everyone asking for seconds!
Why You’ll Love This Recipe
- Bright Flavor: The unique hibiscus infusion adds an unexpected berry twist to the traditional lemon bar.
- Easy to Make: With simple steps and straightforward ingredients, this recipe is beginner-friendly!
- Perfect for Sharing: These bars cut beautifully into squares, making them great for potlucks or gatherings.
- Make Ahead Treat: They store well in the fridge, so you can prep them ahead of time for busy days.
- Vitamin C Boost: Packed with fresh lemon juice and hibiscus, they’re not just delicious but also refreshing!
Ingredients You’ll Need
Making these Hibiscus Lemon Bars is simple and fun! You’ll find that the ingredients are wholesome and easy to come by. Here’s what you need:
For the Crust
- 1/2 cup (1 stick) unsalted butter, room temperature
- 1/4 cup sugar
- 1 cup flour
- Pinch of salt
- 1 tsp vanilla bean paste
For the Filling
- 1/2 cup fresh squeezed lemon juice
- 1 Tbsp dried hibiscus or hibiscus tea
- 3 large eggs
- 1 1/2 cups sugar
- 1/2 cup flour
- Confectioner’s sugar, for dusting
Variations
This recipe is wonderfully flexible! Feel free to get creative with these variations:
- Add a Berry Twist: Mix in some fresh berries like raspberries or blueberries into the filling for an extra burst of flavor.
- Try Different Citrus: Swap out some of the lemon juice for lime or orange juice for a unique citrus spin.
- Vegan Option: Replace the eggs with flaxseed meal mixed with water (1 tbsp flaxseed meal + 2.5 tbsp water = 1 egg) and use vegan butter.
- Gluten-Free Version: Substitute regular flour with gluten-free all-purpose flour to make it suitable for gluten-sensitive friends.
How to Make Hibiscus Lemon Bars
Step 1: Prepare the Crust
Start by preheating your oven to 350°F. In your stand mixer, cream together the room-temperature butter, sugar, and vanilla bean paste until smooth. Then, gently mix in the flour and salt until just combined. This step creates a buttery base for your bars that’s both tender and delicious! Press this dough evenly into a 9×9 baking pan (lightly floured fingers help here), then chill it in the fridge for about 15 minutes while you prepare your filling.
Step 2: Bake the Crust
Once chilled, bake your crust in the preheated oven for about 15 minutes until it’s lightly browned. It’s important not to overbake it at this stage; you want it just set as it will continue cooking when we add the filling. Once baked, let it cool while keeping your oven on.
Step 3: Prepare the Filling
While your crust cools down, let’s make that amazing filling! Stir dried hibiscus into fresh lemon juice and let it sit for about 15 minutes; you’ll notice it turning a gorgeous dark pink color. After that time, strain out the hibiscus—this will infuse all its wonderful flavor into your bars!
Step 4: Combine Ingredients
In a separate bowl, whisk together eggs and sugar until well blended (this ensures your filling is nice and smooth). Next, stir in that vibrant lemon juice mixture followed by blending in flour. This creates a silky filling that pairs perfectly with our buttery crust.
Step 5: Bake It All Together
Pour this luscious filling over your cooled crust and pop it back into the oven for another 20-25 minutes. You’re looking for it to be set in the center—no jiggles here! Once done, let them cool completely before slicing; patience pays off here!
Step 6: Serve & Enjoy!
Finally, dust those beautiful squares with confectioner’s sugar just before serving. There’s nothing quite like sharing these Hibiscus Lemon Bars with friends or family—they’re sure to brighten anyone’s day!
Pro Tips for Making Hibiscus Lemon Bars
Making these Hibiscus Lemon Bars is a breeze, especially with a few handy tips to ensure they turn out perfectly every time!
- Use fresh ingredients: Freshly squeezed lemon juice and high-quality hibiscus will enhance the flavor of your bars, giving them a vibrant and zesty kick.
- Chill the crust before baking: Chilling the dough helps it hold its shape better during baking, resulting in a flaky and tender crust that doesn’t shrink.
- Don’t overbake: Keep an eye on the filling while it bakes; if it’s set but still slightly jiggly in the center, it’s perfect. Overbaking can lead to a rubbery texture.
- Let cool completely: Allowing the bars to cool fully before slicing helps achieve clean edges and prevents them from crumbling when you cut them.
- Dust with powdered sugar just before serving: This not only adds a beautiful finish but also enhances the sweetness without making them overly sugary.
How to Serve Hibiscus Lemon Bars
These Hibiscus Lemon Bars make for an eye-catching dessert that’s perfect for any occasion. Here are some ideas on how to present and enjoy them!
Garnishes
- Fresh mint leaves: A sprig of mint adds a pop of color and a refreshing aroma that complements the citrusy flavor.
- Lemon zest: Sprinkling some lemon zest on top offers an extra burst of citrus flavor and brightens up the presentation.
Side Dishes
- Berry compote: A warm berry compote made from blueberries or raspberries pairs beautifully with the tartness of the lemon bars, adding sweetness and a touch of elegance.
- Whipped coconut cream: This dairy-free option provides a creamy contrast to the tangy bars, making for a delightful pairing.
- Vanilla ice cream: A scoop of vanilla ice cream adds a rich creaminess that balances out the tartness, making each bite even more indulgent.
- Green tea: Serving your bars with a cup of green tea not only complements their flavors but also adds a soothing element to your dessert experience.
Make Ahead and Storage
These Hibiscus Lemon Bars are perfect for meal prep, allowing you to enjoy a refreshing dessert throughout the week.
Storing Leftovers
- Allow the bars to cool completely before storing.
- Place them in an airtight container.
- Store in the refrigerator for up to one week.
Freezing
- Cut the bars into squares and lay them on a baking sheet.
- Freeze for about 2 hours until solid.
- Transfer the frozen bars to a freezer-safe container or bag, separating layers with parchment paper.
- They can be frozen for up to three months.
Reheating
- To enjoy your hibiscus lemon bars warm, preheat your oven to 300°F (150°C).
- Place bars on a baking sheet and heat for about 10-15 minutes.
- Serve warm with a dusting of powdered sugar if desired.
FAQs
What are Hibiscus Lemon Bars?
Hibiscus Lemon Bars are a delightful dessert combining the tartness of lemon with the floral, berry-like flavor of hibiscus. They have a buttery crust and a creamy filling that is both refreshing and satisfying.
Can I make Hibiscus Lemon Bars ahead of time?
Absolutely! These bars are great for making ahead. You can store them in the refrigerator for up to one week or freeze them for longer storage. Just remember to let them cool completely before storing!
How do I adjust the sweetness in Hibiscus Lemon Bars?
If you prefer your bars less sweet, you can reduce the amount of sugar in both the crust and filling. Start by decreasing it by 1/4 cup, then taste before baking to see if it suits your preference.
Final Thoughts
I hope you enjoy making these Hibiscus Lemon Bars as much as I do! They’re not just delicious; they’re also vibrant and beautiful, perfect for sharing with family and friends. Whether it’s for a special occasion or just because, these bars will surely brighten your day. Enjoy every bite!
Hibiscus Lemon Bars
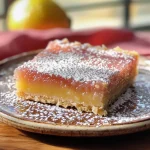
Hibiscus Lemon Bars are a vibrant twist on a classic dessert that will brighten your day with every bite! These delightful bars combine the tartness of fresh lemon juice with the unique berry-like flavor of hibiscus, creating a refreshing treat that’s perfect for any occasion. Whether you’re hosting a family gathering or simply indulging after a busy day, these easy-to-make bars will impress everyone and have them coming back for seconds. The buttery crust serves as the perfect base for the silky filling, making these Hibiscus Lemon Bars not just delicious but also visually stunning. Dust them with powdered sugar just before serving to add that finishing touch!
- Prep Time: 20 minutes
- Cook Time: 40 minutes
- Total Time: 1 hour
- Yield: Approximately 12 servings 1x
- Category: Dessert
- Method: Baking
- Cuisine: American
Ingredients
- 1/2 cup (1 stick) unsalted butter, room temperature
- 1/4 cup sugar
- 1 cup flour
- Pinch of salt
- 1 tsp vanilla bean paste
- 1/2 cup fresh squeezed lemon juice
- 1 Tbsp dried hibiscus or hibiscus tea
- 3 large eggs
- 1 1/2 cups sugar
- 1/2 cup flour
- Confectioner's sugar for dusting
Instructions
- Preheat your oven to 350°F (175°C). Cream together butter, sugar, and vanilla paste until smooth. Mix in flour and salt until combined.
- Press dough into a greased 9×9 baking pan and chill for 15 minutes.
- Bake crust for 15 minutes until lightly browned. Let cool.
- Infuse dried hibiscus in lemon juice for 15 minutes, then strain out hibiscus.
- Whisk eggs and sugar together, then stir in lemon juice mixture and flour.
- Pour filling over the crust and bake for 20-25 minutes until set.
- Cool completely before slicing and dust with confectioner’s sugar.
Nutrition
- Serving Size: 1 square (45g)
- Calories: 180
- Sugar: 18g
- Sodium: 50mg
- Fat: 8g
- Saturated Fat: 5g
- Unsaturated Fat: 3g
- Trans Fat: 0g
- Carbohydrates: 25g
- Fiber: 1g
- Protein: 2g
- Cholesterol: 55mg
Leave a Comment